Faculty, staff, and student researchers at Scripps Institution of Oceanography at UC San Diego faculty can have these enhanced profiles, which include biographies, publications, and research interests.
Need help or need Scripps Web Services to set up a profile for you? Submit a support request
Here's what we need from you to start (your CV will do if it includes this information):
- A bullet list of research interests.
- A bullet list of your degrees.
- A list of your publications.
- A headshot.
Where the pieces come from
Much of the content of the research profiles is pulled from other sources and dynamically incorporated into your site.
Contact Info
Mailing address, office location, phone number and other information are pulled from your record in the Scripps People Database system.
Ask your Business Office or the SIO Dept. (for students) for updates.
Research Topics

Research topics from this list of 80 faculty-selected terms are pulled from your record in the Scripps People Database system.
Ask your Business Office or the SIO Dept. (for students) for updates.
Classes
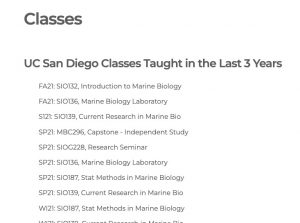
Classes pages list the courses tought by the instructor within the last three years. This data is pulled from a UC San Diego database that is updated after the start of every quarter.
Publications

Publications are fed from a master Zotero database maintained by Scripps I.T. and updated monthly based on alerts from Web of Science.
What can I edit directly?
Content you can edit through WordPress:
- Research interests
- Degrees
- Biography page
- Other pages you've created
- Your photo
Before anything else: Logging in
- Log in by clicking on the "log in" link in the lower right-hand corner of your site's home page.

- Select the "Login with Google" button.
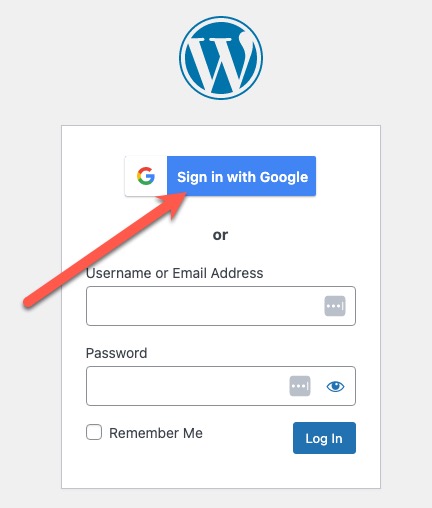
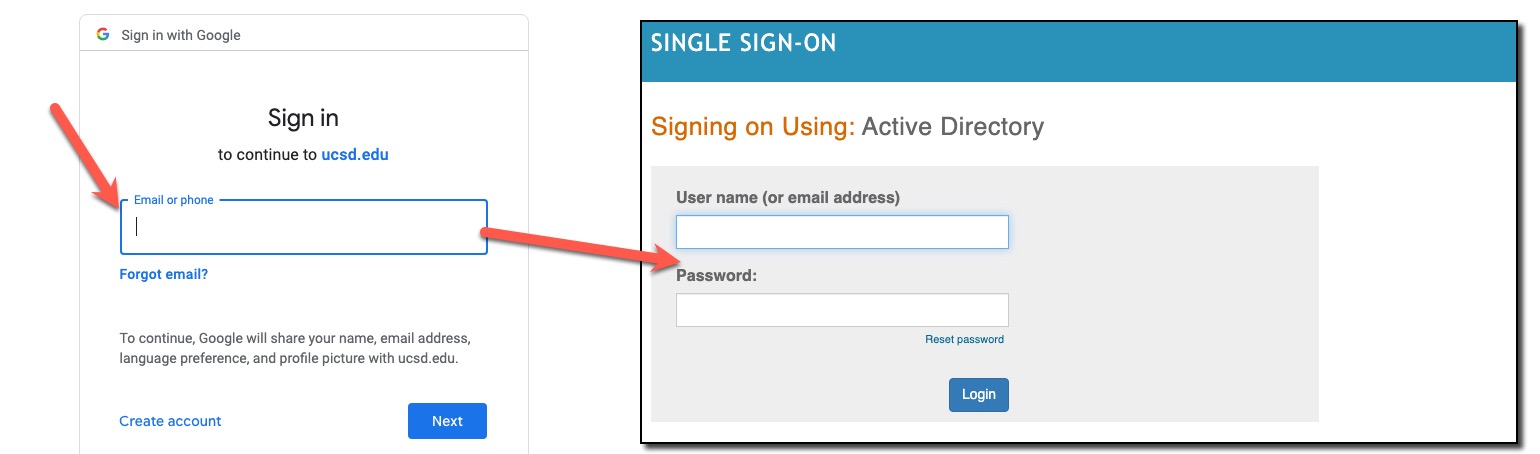
- When prompted, select or enter your Active Directory login and password, the same as you use for your email.
- This will take you to your site's Dashboard page, which has more than you really need. You can navigate back to your home page by mousing over your name in the toolbar and selecting "Visit Site" or use the Pages link in the left-hand navigation to select your home page.

Editing what's on the home page
Quick Editing
- Select "Edit Page" from the toolbar at the top of your browser window, then select "Edit with Cornerstone."
(Cornerstone is the plugin that lets you make fancy-looking pages.) - Double-click into your copy to activate the editing box. Click into your text to start editing it.
- When done, make sure to click the "SAVE" button in the lowerleft-hand corner to publish your changes.
- For more complicated changes, please email sioweb@ucsd.edu for help or advice.

Changing your photo
The ideal photo is a square of at least 140 pixels on a side with you in the center, since the system will crop in from the edges.

- On the home page, at the top of the page, click "Edit Page."
- Click the bright orange "Edit with Cornerstone" button.
- When the editing panel opens up, click on the photo under "Image" on the left.
- The current photo will disappear; click on the box again to start the upload dialog and navigate to wherever you saved your new photo.
- Select "Insert into post"
- Click on "Save" in the lower left-hand corner of the page.
- Your updated photo will now appear on your home page and in the directory on the home page of scrippsprofiles.ucsd.edu.
Editing internal pages
- Navigate to the page you want to edit and click "Edit Page" in the top toolbar.
- This will open the page for direct editing of the body text or title. (Note that some pages such as the "Publications" and "Classes" pages will only display a shortcode that loads your information from a database. You can't edit that content directly, but you can add text above or below the shortcode.)
- Click on the "toolbar toggle" button to see a few additional editing tools. Editing content on these pages is fairly straightforward, just like formatting email or Microsoft Word documents.
- Use the "Add Media" button to upload photos or documents such as PDFs and insert them into the body field.
- Make sure to click on the "Update" button when you are done to save your changes.
See this official WordPress guide for more details, or email sioweb@ucsd.edu.